People have used hardwood timber as their first choice of flooring for decades. It is due to their flexible mechanism and layout. Hardwood flooring also makes your home feel closer to nature, which adds personality and elegance to each room.
If your wooden floors have scratches and abrasions from sanding and irregular polishing, they will look shabby. With some preparations, your floor can last for a century.
You could polish it with a high gloss or satin finish. A satin finish is long-lasting and has a subtle sheen and a modern matte finish. If you are worried about installing flooring in your new home, consider the following tips to get your desired look.
1. The Thickness of Your Hardwood Timber Floorboards
The thickness of your floorboards is critical to the structural integrity of your home. The thicker the wooden plank, the less likely the floor will rupture from a heavy falling object.
There will only be a certain number of times you will be able to sand your floorboard. If you have installed thin flooring boards, each sanding will remove a layer from the plank, making it thinner. You will need to change the entire layout of your floor and install new boards before long.
You can put in high-quality engineered hardwood flooring. There will be sufficient thickness that allows it to be sanded back several times without losing quality. In case of a damage or repaint job, you could sand the top layer off and polish it again.
Professionals can inspect to ensure adequate thickness that will guarantee the stability and longevity of your floorboards. With proper planning ahead, your floors can last a century.
2. Types of Hardwood Timber Floor
There are several types of wood flooring you can choose from. Each individual choice will possess advantages and disadvantages. It is important to know which tree your wood has been acquired from.
American walnut is a delicate, dark wood with a unique rippled pattern. It is easily dented and scuffed, especially if placed in areas with more traffic.
Cherry wood flooring is widely liked, although it is more costly due to its immaculate exterior. Its color is a dynamic light reddish-brown with noticeable, swirling grains.
Oak is probably the most popular type of hardwood used in flooring. It is long-lasting, inexpensive, and simple to work with. Maple flooring is typically tougher than oak planks and is used commercially in high-traffic areas.
Pine is a comparatively soft wood that is abundant in some countries, making it a cost-effective and environmentally friendly flooring option. Pine does not always lend itself well to refinishing because it dents and scrapes easily.
3. Assess Thoroughly Before Hardwood Timber Floor Sanding and Polishing
When you speak to your local floor sanding contractor, you will be asked to assess your floor thoroughly before installation. You will need to do retouching in the future if you plan to build your own home.
Assessing is required because different wood species necessitate various processing techniques in refinishing projects. Tougher and stronger hardwoods, such as oak and maple wood, are easier to refinish. Pine is more difficult to work with, but with proper care, it can also be sustainable.
Engineered wood floors, even though less expensive, are not usually great choices for remodeling because the veneer on top peels right off when you start sanding.
Once you have lived in your home long enough, your wood choice will determine if it can take one more sanding. You could check how much hardwood is left by pulling up the heating grate. If you start to notice nail heads, then it is wise to not sand any longer.
4. Sanding Your Hardwood Floor Needs Preparation
Sanding the hardwood floor of your new home can be challenging. A few steps in preparation can make the job easier for you.
Cleaning the entire area with proper hardwood floor cleaner is an important step, even if it seems minor. Get rid of any paint or other stains as much as possible. Make sure the nails are hammered in properly all over the layout. Fix any loose or exposed nails.
Use proper methods and tools to carefully remove your trims out of the way. You do not want to destroy your crown molding or baseboards during the sanding phase.
Place some sheets and protective covers over the walls and doors and other surfaces, such as kitchen counters. Sanding dust can go into nooks and corners, which can be difficult to clean.
Plan on sanding your floor aggressively with 36-grit sandpaper. Some floors may even necessitate the use of 24 or 16-grit paper.
5. Sand and Buff Your Hardwood Floor
For the initial sanding process, use a drum sander. Start from the center of the house first, then finish the sides with an edger. There will be no buildup on the edges of newly installed floors.
Wear a respiratory mask and protective equipment while sanding, as the process generates a lot of dust and splinters that can harm you. Sand with an angled grain. To avoid gashes or lines on, go across each row two times, overlying your previous pass.
The sanding belt needs to be replaced if it becomes clogged. In the next pass, eliminate any scuff marks created by the first pass. To make your floor look new, use an 80-grit or finer sanding pad.
Apply a buffer in your final pass to smooth out any residuals and spots. Start going back and forth, once again overlapping each layer. To stop leaving any traces, keep the buffer moving throughout the process.
6. Choose a Suitable Polish for Your Floor
Timber floor polishes are available in a variety of reliability and appearance levels.
Polyurethane is a long-lasting, water-resistant, or oil-based plastic lining. It is currently the most popular finish. Your floor will appear to be coated in a plastic film, and you will not be able to sweep up any gooey residue. They are available in satin and gloss finishes.
Solvent-borne finishes include penetrating oils and sealers. The method is traditional, with sealants, such as linseed oil, submerged deeply into the porous wooden structures. After that, most of these floors are waxed. These sealers are typically incompatible with a polyurethane covering and must be completely stripped during refinishing.
Wax can be used as the sole finish, or it can be implemented above other sealers. Scoop up sticky, clumpy residue from your wax floor easily, especially in corners. Before applying any other sealant, the wax must be removed.
7. Applying the Finish to Your Hardwood Floors
Based on the type of your finish, blending can either be a simple task, like shaking the container, or can include a complex mixture of added hardener, which requires the finish to be strained several times.
A synthetic applicator spreads it smoothly over the desired area rather than absorbing the finish. T-bars are the best choice for the most open areas in your home. Brushes, rollers, and pads can all be used to inject the small gaps in your floors with the finish.
Pick the farthest wall as your starting point. Cover the rim of that wall with a path of finish. The path should be at least 3 – 4 inches wide and run parallel to the grain of the floor.
Strive for seamless strokes with gentle pressure, as this may create bubbles. When pushing the polish, use a mild, constant amount of pressure, but avoid it when dragging it towards you.
8. Hardwood Flooring for Large Spaces
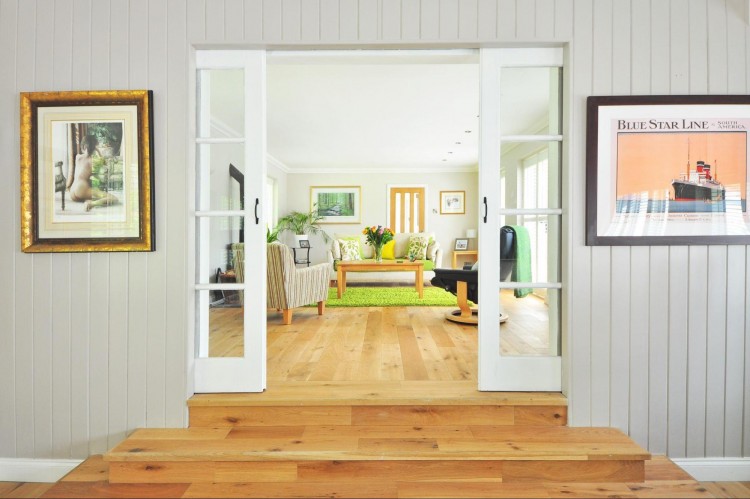
Hardwood is an excellent material for large open areas of your home. This is due to the natural markings and patterns found on its surface, which will help to change the blandness of the room.
Timber floorboards act as a stunning background while also infusing attention and styling into the room. The use of parquet hardwood installations will amplify the beauty of your large porch.
Parquet is a style of arranging floorboard flooring. The process consists of placing tiny boards of one piece of wood into an angular mosaic shape. This type of flooring requires extra care during sanding and polishing, along with regular maintenance but enhances the natural beauty of your home.
Oak, Hickory, and walnut wood, with their durability and simple usability, make the perfect choice for parquet.
9. Consider the Price of Your Hardwood Floor
While setting a budget for your new home, you might have queries about how much it costs to install hardwood floors. About fifty to seventy percent of your flooring budget will go into the materials.
Sustainable and eco-friendly materials, such as Pine and Bamboo, fall in the cheaper range of flooring materials. They cost between $4.50-$11 per square foot. The mid-range wood types like Hickory and Red oak have visible graining and are particularly durable even in high-traffic areas of your home. The price starts from $6 per square foot, reaching $13.
The most durable and hard-to-stain types of timber are White oak, White ash, and Brazilian walnut, the latter being an exotic wood type. They have visible knot patterns on their surface, giving your home a natural, warm ambiance. Their prices range from $8-$20 per square foot.
Final Thoughts
It is quite exciting to install new floors in your home with the anticipation of moving in. Sanding and polishing can make your hardwood floor look more elegant and lively.
Pick out a type of wood that best suits your taste and fits your budget. Consider talking to a specialist to get the right thickness and assess your floor before moving on to the next process.
Prepare ahead for the process of sanding and polishing for the best outcome.
NB: your keyword has been used only once in the passage, and that too in the heading only. Nowhere else.


